To help you get set up within your host application/DAW, Stutter Edit 2 has DAW-specific setup steps within the plugin itself. You can find this by clicking the Mode button towards the top of Stutter Edit 2.
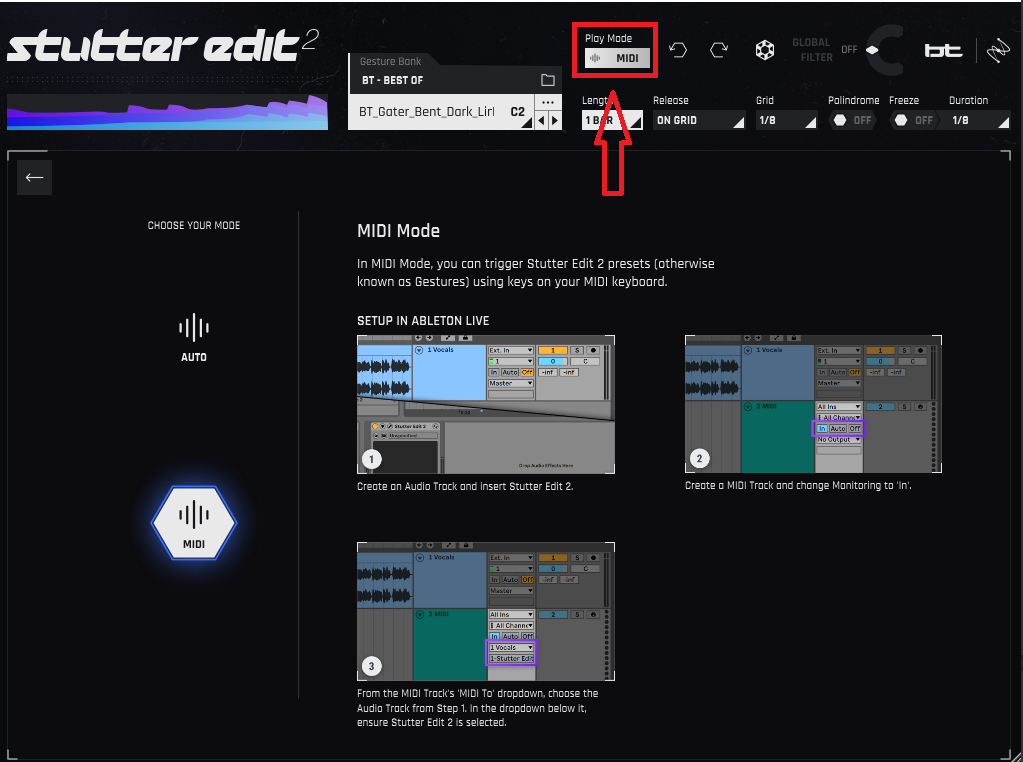
Supported Host Applications setup:
Other Host applications:
- Insert Stutter Edit 2 on an audio track or bus, as you would any other audio effect plug-in.
-
Next, route a MIDI or Instrument track in your DAW to the Stutter Edit plug-in, or make sure Stutter Edit 2 can receive MIDI from your MIDI controller (some DAWs, including Ableton Live, allow using your computer keyboard to trigger MIDI notes). Audio must be going through the Stutter Edit 2 plug-in and it must be triggered by a MIDI note before you can hear it add an effect. Note: If you don’t have a MIDI controller, click on the Play Mode button toward the top of the interface, and choose Auto mode. In this mode, Stutter Edit 2 will automatically activate a Gesture, as selected in Step 5, when the DAW playback starts.
- Start playback at your DAW application's transport, so that audio goes through the track or bus containing the Stutter Edit 2 plug-in.
- Play notes on your controller, or start painting notes into your MIDI track, to trigger effects in the currently loaded Bank.
- Explore Stutter Edit 2's available Banks by clicking on the Gesture Bank drop-down menu at the top of Stutter Edit 2’s interface, and clicking on the keyboard graphic to select different Gestures within the Bank.